Archive | Major Practical Project (Year 3) RSS feed for this section

Final Major Practical Project

7 May

After a long, stressful year, major practical project is finally coming to a close. It has been very enjoyable and I learnt new skills and technique through this process. Below are the deliverable requirements for this assignment.

Presentation

Cryptic Ace Apparel Branding Guidelines

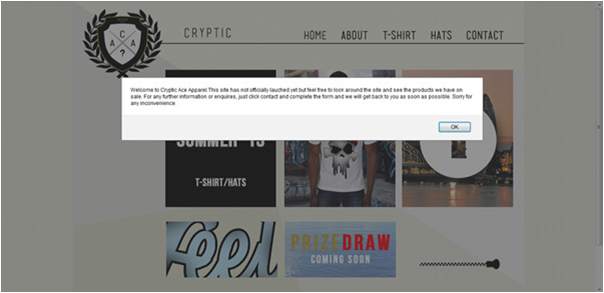
Cryptic Ace Apparel Website Link

Major Project Brief – Stefan Barretto

Website: www.crypticaceapparel.co.uk

Logo

Cryptic Crest Logo

T-Shirt Design

Hat Designs

Final Cryptic T-shirt Designs

3 May

The requirements for this brief was to design 10 t-shirts designs. I did an additional 2 more designs. The images below shows the final designs.

Designs Incorporated onto Clothing

1 May

The images below the shows the t-shirt desigsn incorporated on clothing.

The images below the shows the hat designs incorporated on clothing.

Dreamweaver Pop Up Message

16 Apr

Picture2

When the user click enter on the index page, a pop up message will appear stating that the site isn’t fully launched yet, so purchasing products will not be possible but they are still able to view the site and see what is available.

The screenshot below shows how I did this using Dreamweaver.

Picture3

Dreamweaver Gallery Page

16 Apr

Picture1

When the user click on image on the homepage, it will direct them to the page  that the screenshot shows above. When clicked on any of the images, a larger image will appear in a gallery. The function of this gallery will enable to user to go back and forth on the images.

Dreamweaver Homepage

16 Apr

Screen shot 2013-05-07 at 15.17.54

The screenshot above shows the final layout for the homepage. As this was the main page, I had to make it appealing and visually strong and it is this page that will entice the audience. On this make I created a rollover image where the cover changed to a different colour.  Another one was a click image that when the audience clicks on the image, it will direct them to another page and to be specific, this link will direct the user to a photo gallery of the products.  There was also information in the form of images, that directs a message to the user, informing that there will be a prize draw; by doing this it interacts with them by getting them involved with the brand and product.

Dreamweaver Hat/T-Shirt Page

16 Apr

The screenshot below shows the layout format for all the products. It presents the cost of the items. When clicked on an image, it will take you onto another page where you can see the item in more details. Also the arrow isn’t just a typical standard arrow. It designed to reflect upon the brand.

Picture2 Picture4

Inside page layout for products

Picture3 Picture5


Dreamweaver About Page

16 Apr

The screenshot below show the about page. On this page, it presents the information in a circle so it draws away the attention of the other pages being similar; it breaks down all the elements.  To making the text not looked cramped and readable to the audience, i adjusted the kerning. Certain information is highlighted in a different colour as theses information will be able to some up about the brand instantly.

Picture1

Dreamweaver Index Page

16 Apr

Screen shot 2013-05-07 at 14.51.23

The screenshot above shows that I created the index page for my website using Dreamweaver. I placed in the background and brought in the other elements and positioned them in the required position. To make the opening page interesting, I added a behaviour upon the logo. By doing this it enable the image to fade in; like the mage was loading up the page.

To not draw away the attention of the logo, the text is in small stating “to click onto the logo to enter”. The background of the page, is that same background that is used on the guideline book; this keeps a link between everything that is related to the brand.


Website Background Layout – photoshop

16 Apr

To help me come up with the layout and sizing of the elemenet within the wesbite, i brought and created the format of the designs in photoshop.  The screenshots below shows this.

Screen shot 2013-05-07 at 14.09.46 Screen shot 2013-05-07 at 14.09.32 Screen shot 2013-05-07 at 14.09.29 Screen shot 2013-05-07 at 14.08.38

By inserting the image into the positioning of the designs, it enabled me to work out  the correct size and dimension of the separate elements for when I insert everything into.  I liked the overall layout of the design. I wasn’t to fussed about the use of type, as I am going to be able to experiment when start creting the contents within Dreamweaver.